|
|
Documentation
v3.4.0 |
|
Unity Crash CourseRetroBlit offers a code-only development approach that is very unlike normal Unity development, however a very basic knowledge of Unity is still required to setup a RetroBlit project. This guide will help you get going in minutes! If you've ever done anything in Unity before you will likely not need this guide at all. Get Unity!Download and install Unity from the Unity website. Unity installs are managed by Unity Hub application. Within the Hub you can not only manage your projects, but also multiple installations of different Unity versions. The minimum supported Unity version for RetroBlit is 2019.3. In this crash course we'll use Unity version 2019.4 LTS. LTS stands for Long Term Support, Unity releases at least one LTS version per year, and supports it for an extended amount of time. It's usually best to pick an LTS version of Unity for greatest stability and support. 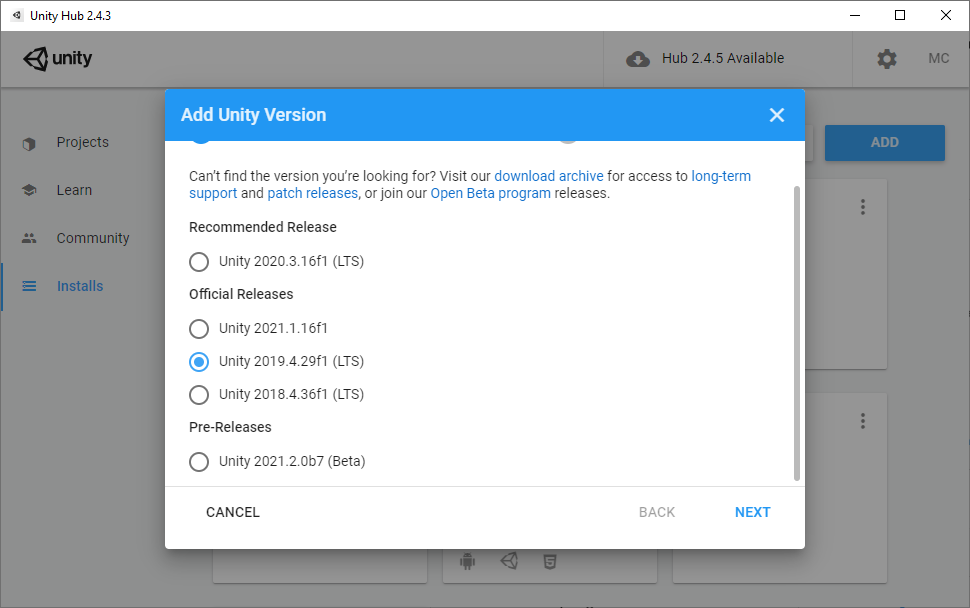
Unity Personal edition is free of charge (as in beer, no credit cards, no royalities) so long as your annual revenue from your Unity projects (or related fundraising) is under a certain amount, a large amount at that. Beyond these revenue limits you would need to pay for Unity Plus, a very reasonable amount given the revenue bracket you would be in. See the Unity website for up to date details. When installing Unity you will be presented with a list of platforms you want to support, as well as other optional tools. You can change your installation at any time so don't worry about making the wrong choice here. 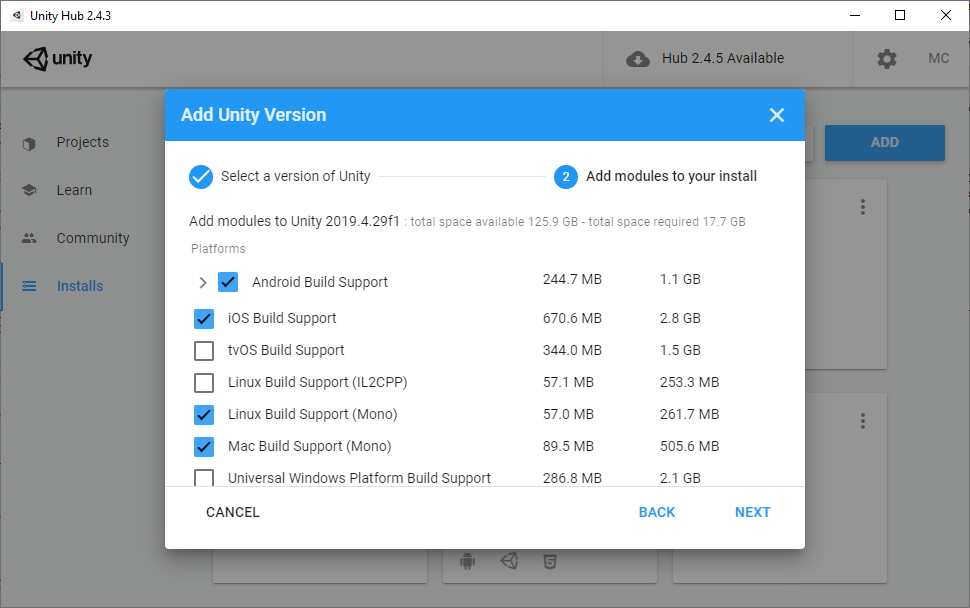
Create a RetroBlit ProjectWhile setting up your first project you will require internet connectivity. Afterwards you only require internet connectivity if you want to update Unity and/or RetroBlit. Launch Unity from your Desktop. The first time you launch Unity you will be asked to login with your account. If you do not have a Unity account yet you can create one now, or use a sign-in partner like Google or Facebook. 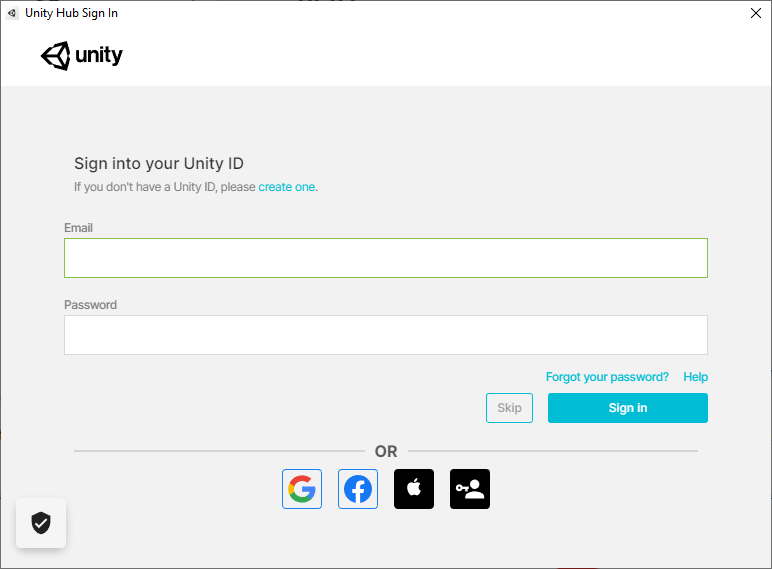
Once logged in you can press New to create your Unity project. A list of project templates will be shown. We're not interested in any of these in particular as they do not relate to how development is done for RetroBlit. I recommend picking the 2D project template as it provides the simplest Unity default layout. 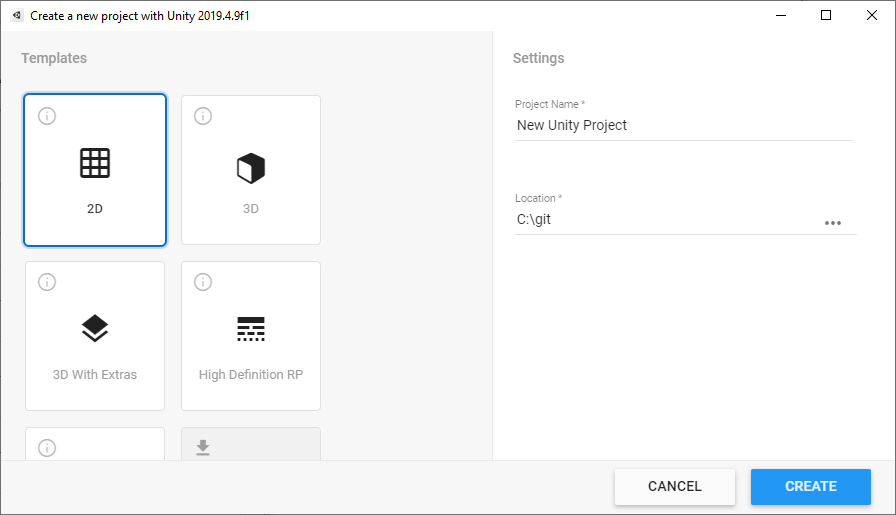
The next screen will be your main Unity IDE screen. It may look overwhelming at first sight, but don't worry, for RetroBlit we only need to learn a tiny subset of this IDE. 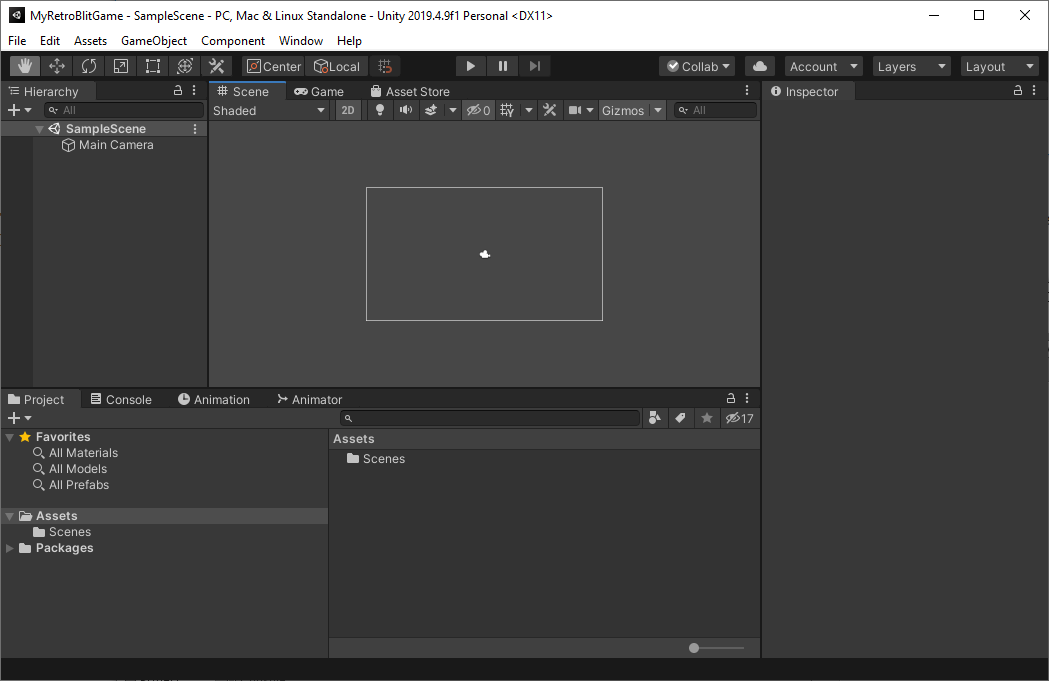
First lets add RetroBlit to this project. Click on Window → Asset Store to open up the Asset Store. 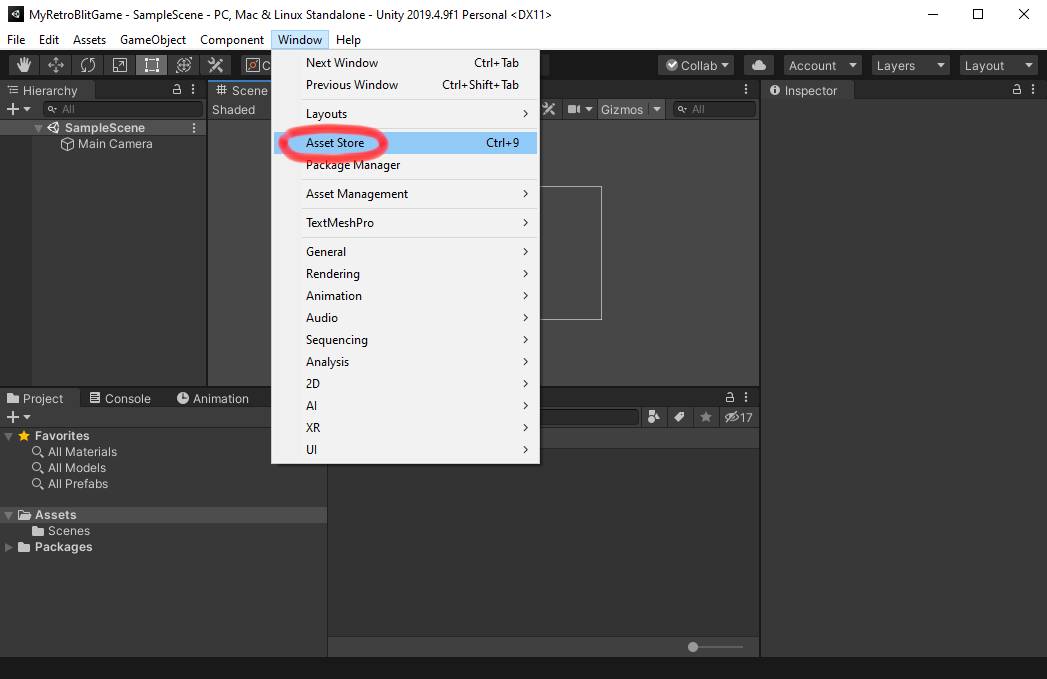
Now search for "RetroBlit". 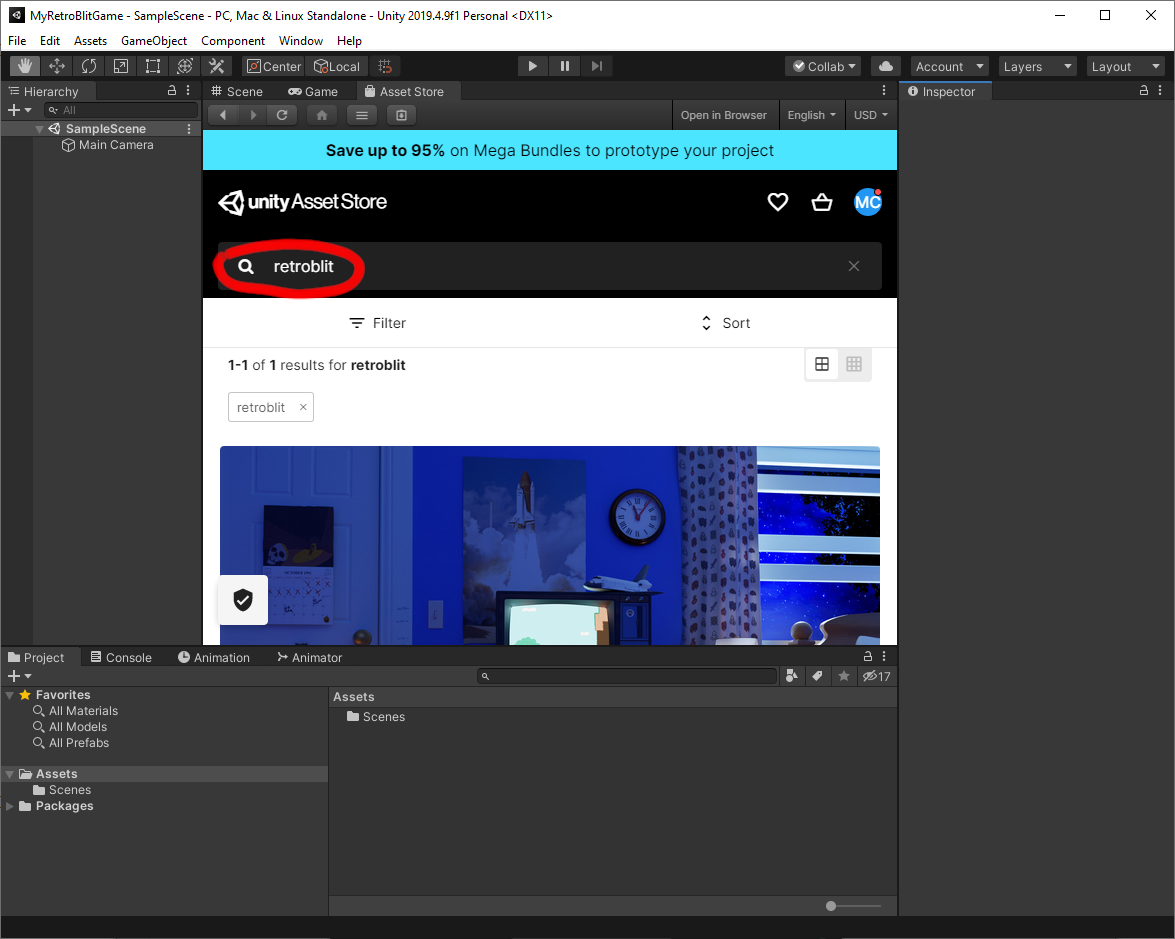
RetroBlit should appear on the top of the search results, you may have to scroll down a bit past the search refining options to see it. Click on RetroBlit Retro Game Framework and you should arrive on the asset page. Scroll down a bit and you will see either an Import button if you already own RetroBlit, an Update button if a new version of RetroBlit is available, or an Add to Cart button if you have not purchased RetroBlit yet. Once ready click the Import button to proceed. 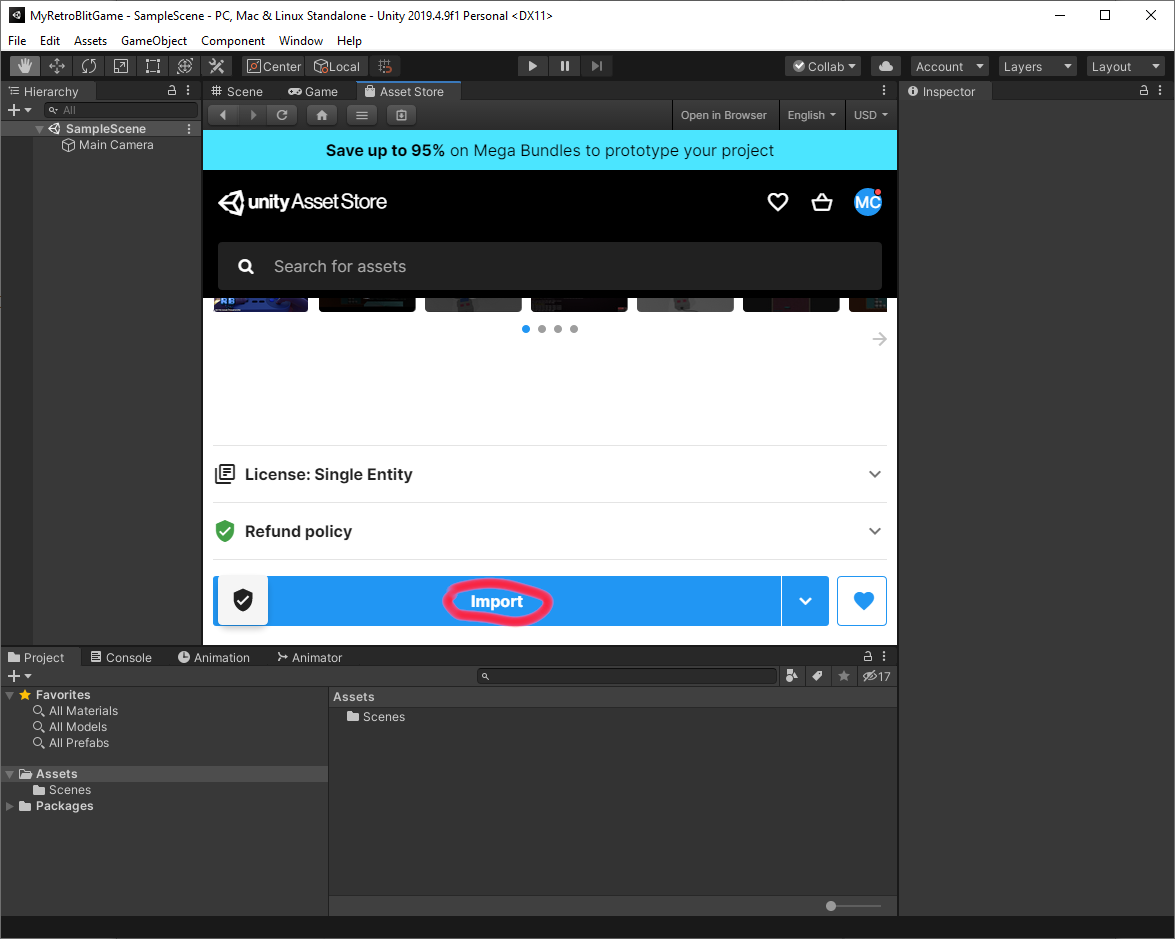
A dialog should show up now warning you that RetroBlit is a Complete Project and will overwrite your existing project settings, we very much want this, click Import. 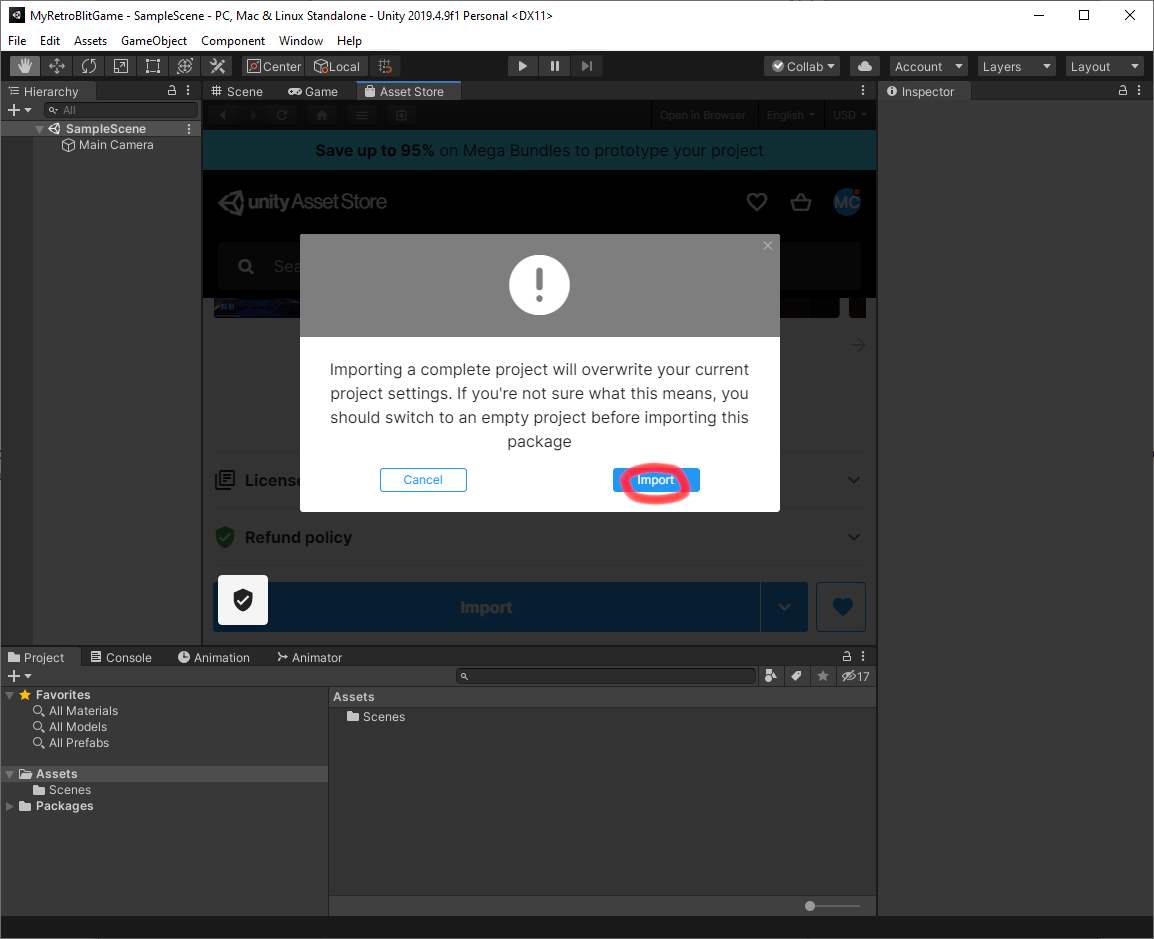
Finally Unity will show you what files it's about to import, leave them all selected and click Import. 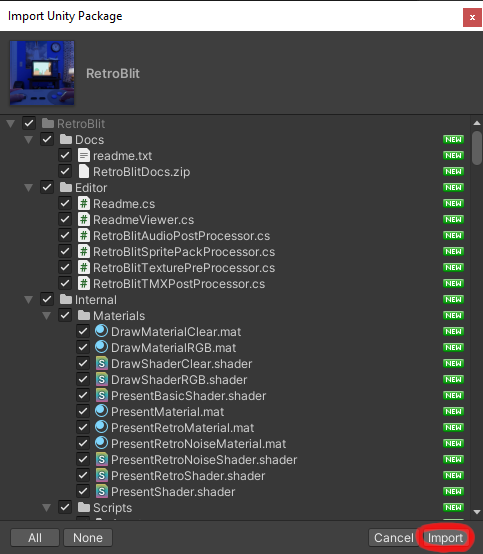
Great, you now have yourself a RetroBlit project! You can now close the Asset Store window by right clicking the Asset Store tab on top. From now on you will not require internet connectivity to develop your game. A Unity project stores all its files in an Assets folder which you can see in the lower left corner of the IDE window. Unity projects are typically split into multiple Scenes, but for RetroBlit we only need one scene per project. To get started expand your Assets folder, and click on the Scenes folder. RetroBlit comes with a bunch of examples including a barebones Scene called MyGame, double click MyGame now. 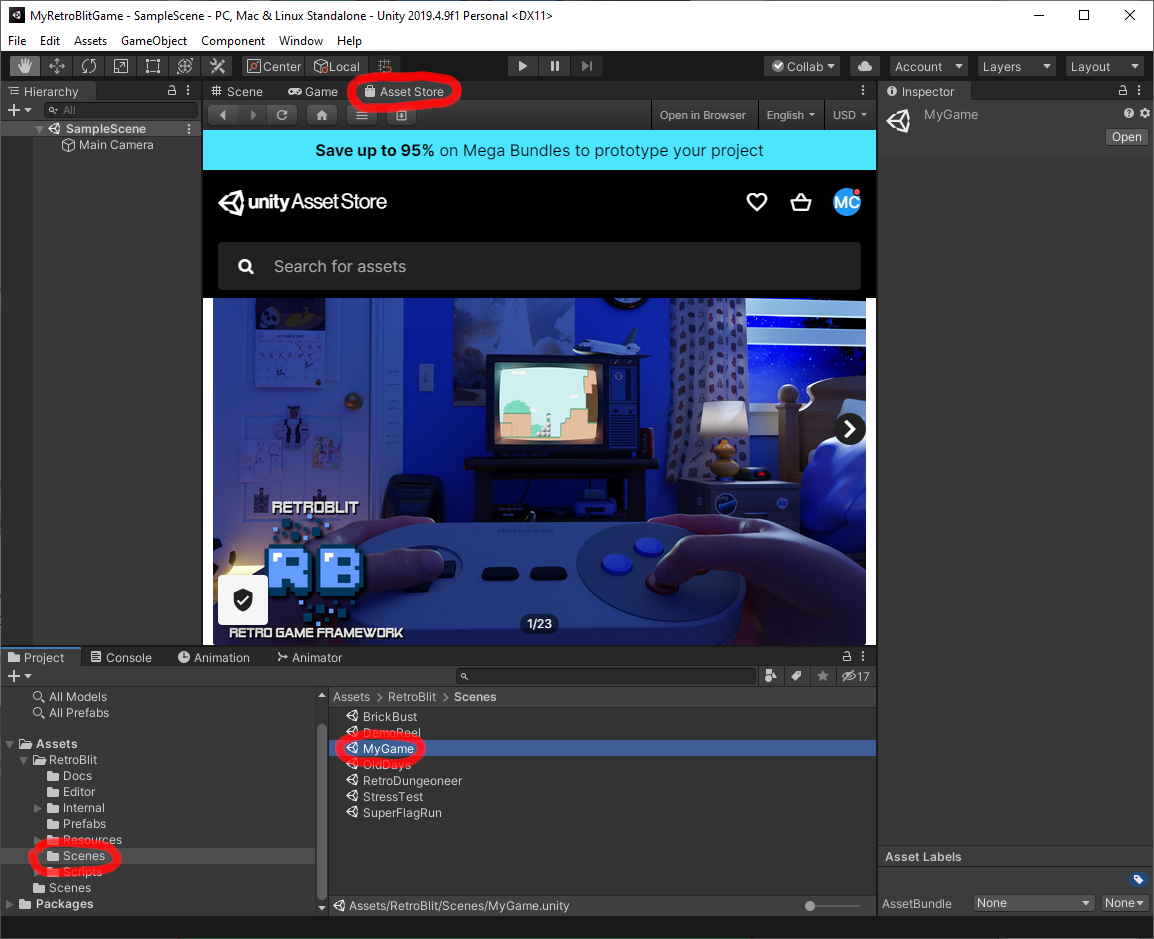
Now click the Play button on top of the screen and... that's it! Your barebones RetroBlit game is running! If you don't see the game make sure the Game tab is selected on the row just below the Play button. 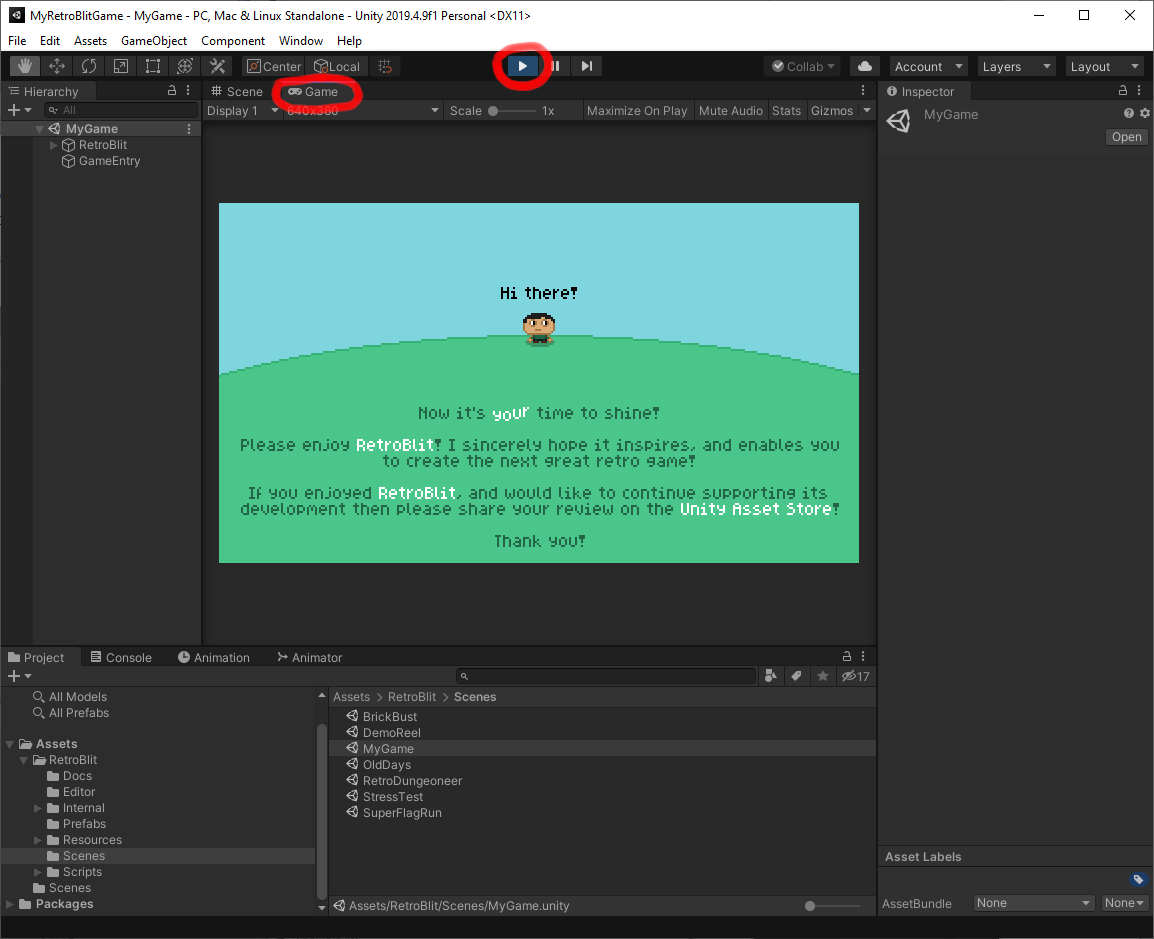
From this point on you will mostly use the Unity IDE to click the Play button on and off, and view runtime logs! Writing CodeTo start writing code you can use Unity IDE to open the project in Visual Studio by clicking Assets → Open C# Project, this option will also create the Visual Studio project if one doesn't exist yet. You can also just double click a source file under the Assets folder (bottom left of the Unity IDE). Finally you can just directly open a source file from your project folder with any editor you like. 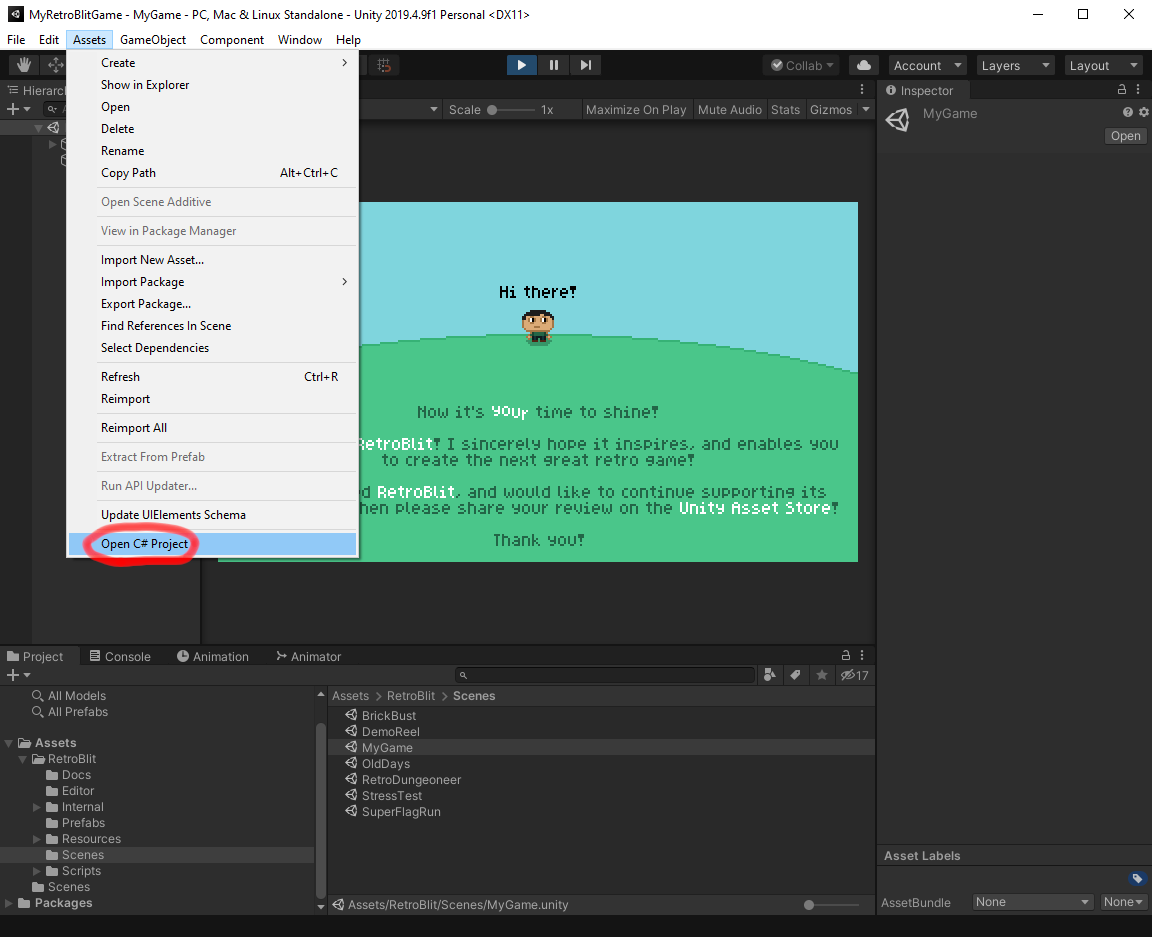
In this guide we're using Visual Studio. Using the Visual Studio Solution Explorer expand the Assets/RetroBlit/Scripts/MyGame folder, and open the MyGame.cs file. The entire demo you saw earlier is contained in this file, have a look. For an explaintion of what is happening here please see The Game Loop. 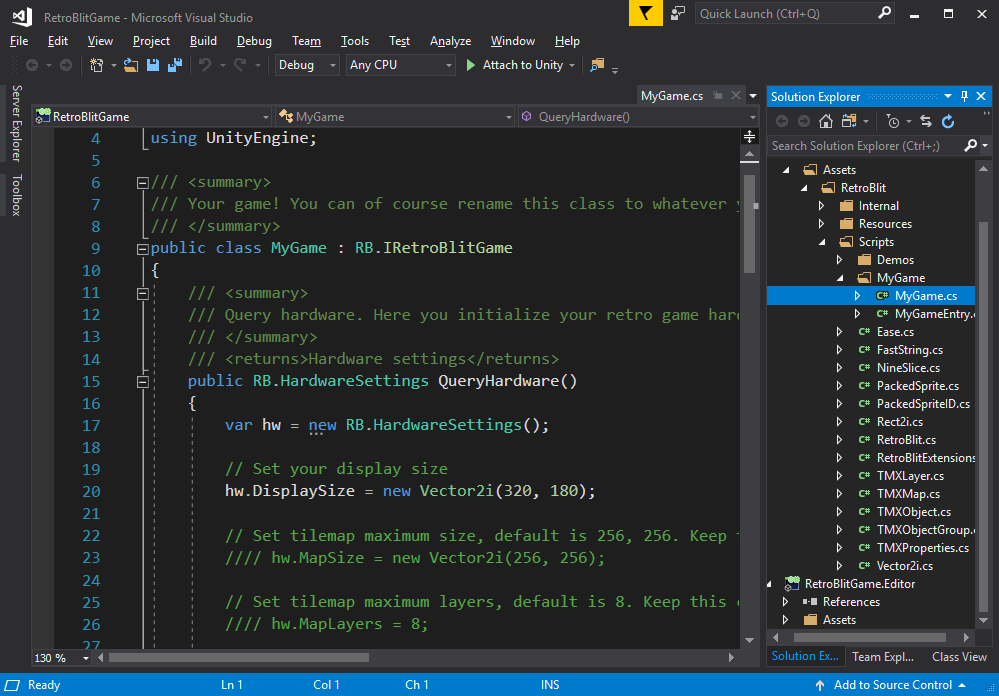
Of course a project of any complexity would require more source files, you can add source files anywhere inside the Assets folder, so go ahead and organize your code how you like it. Compiling CodeCompiling code is trivial! You don't actually have to do anything, when you next click on the Unity IDE window it will scan your project for changed files and compile changed or new source files for you! If there is a compilation error it will be shown on the bottom of the Unity IDE window. Clicking the error will show the console, which may contain more details and other errors. 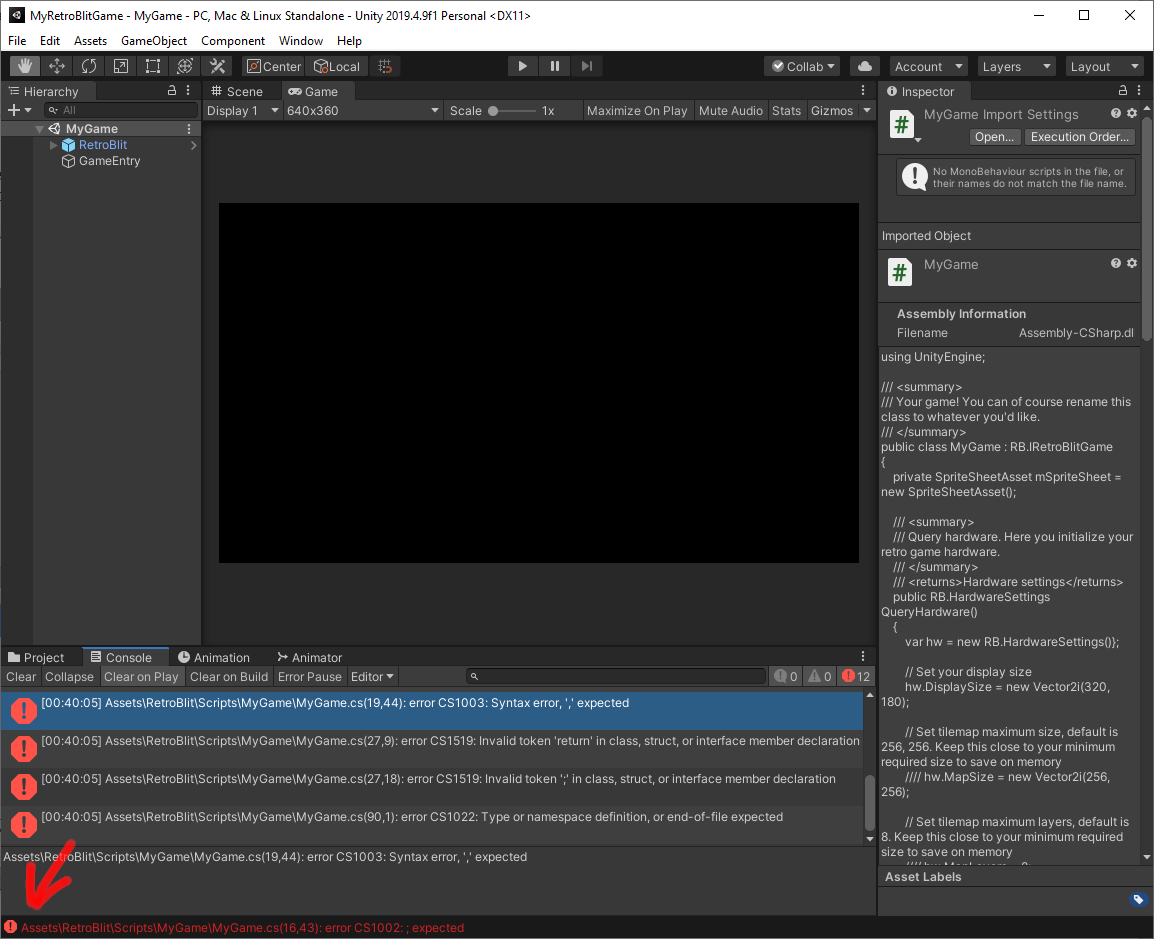
The console is important because it will also show you warnings and logs. You can log to the console yourself:

It gets even better! Double-clicking any log line or compilation error will take you directly to that line of code in your code editor, granted that your code editor supports this level of integration. Adding ResourcesAdding resources is also very trivial. Simply put your images, sounds, music, and even tmx tilemaps into any folder in your project that descends from a folder named Resources. The Resources folder must itself be somewhere under the Assets folder. MyGame example has its sprite sheet located at Assets/RetroBlit/Resources/Demos/MyGame/MySprites.png. As with source file compilation any resource changes are automatically picked up by Unity next time the Unity IDE window is in focus. It's worth noting that in a typical Unity application the user will want to edit specific resource import settings, but RetroBlit takes care of all of that for you, so you do not have to do anything else! DebuggingUnity supports live debugging, which works great with Visual Studio, and some other editors. Simply set your breakpoints in your code editor, and attach to the Unity process. You may also attach to the Unity process before you press the Play button, which is great for setting breakpoints in your initialization code. For Visual Studio specifically you may have to install Visual Studio Tools for Unity to debug Unity, but if you've installed Visual Studio via the Unity installer then you probably already have this plugin installed. Deploying Your GameThis is where Unity really shines. Deploying your project to a wide variety of platforms is very simple! First go to File → Build Settings. 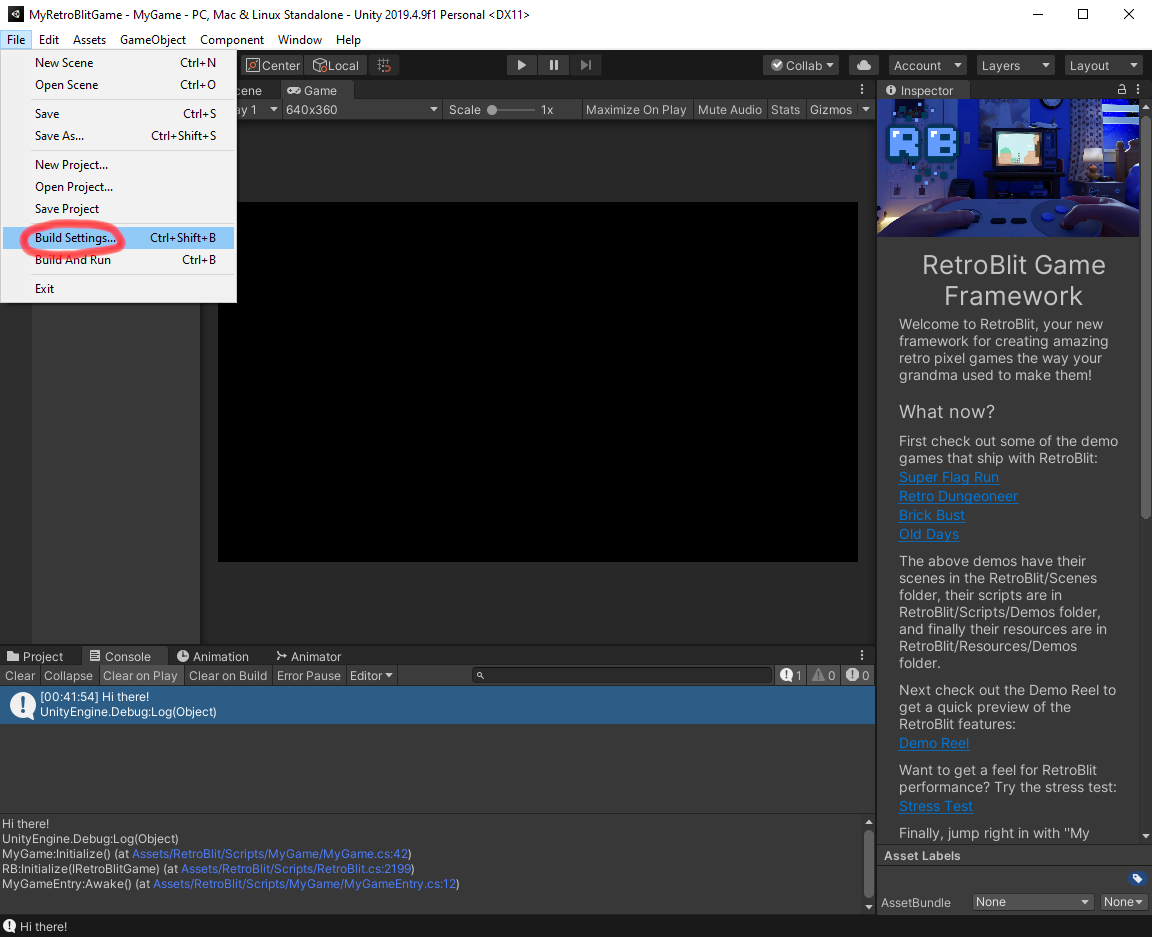
Select your target platform. If you don't see your platform here you may have not installed support for it, just re-run the installer and select the platform from there. Ensure your game scene is shown and selected in the Scenes in Build list. If it is not then you can simply click Add Open Scenes to add it. Now you can just click Build and build your game with default settings, or you can customize the build by clicking Player Settings... 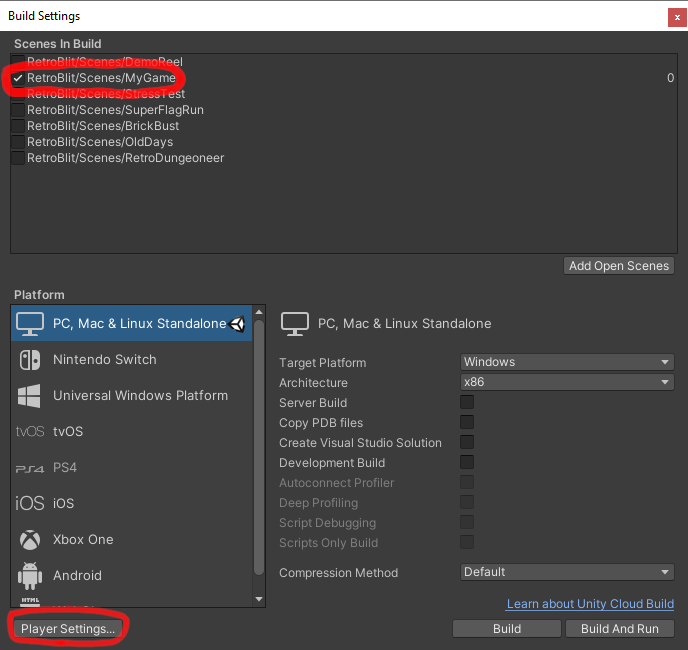
From the Player Settings you can configure a myriad of options, such as game title, icons, splash screens, supported resolutions, portrait/landscape orientation (mobile), developer information, and more. For a final product you will likely want to fiddle with these settings, but meanwhile the default settings will do just fine! 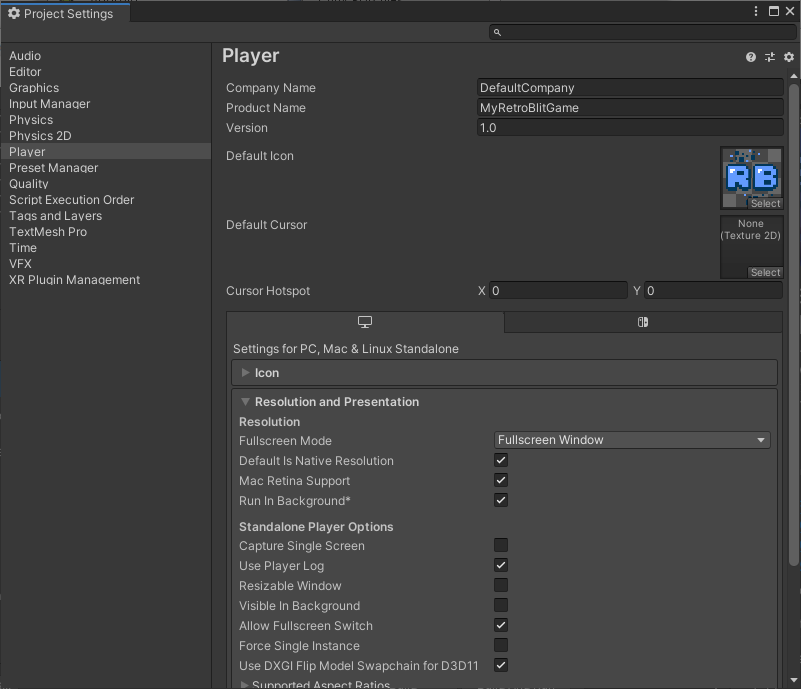
Demo CleanupRetroBlit comes with a number of examples and optional material that you may want to remove to reduce the size of your project. You may delete any of these folders:
Of course if you continue building on top of the MyGame example then make sure you move its files to somewhere else before you delete RetroBlit/Scripts/MyGame, RetroBlit/Scenes, and RetroBlit/Resources/MyGame! Other TipsBecause RetroBlit doesn't use most of Unity IDE you may want to select the option Maximize On Play so that your game window fills more of your screen. Also notice that there is a Scale slider that can resize the game window. If this slider is not at 1x then what you're seeing will be scaled up/down and may look distorted. 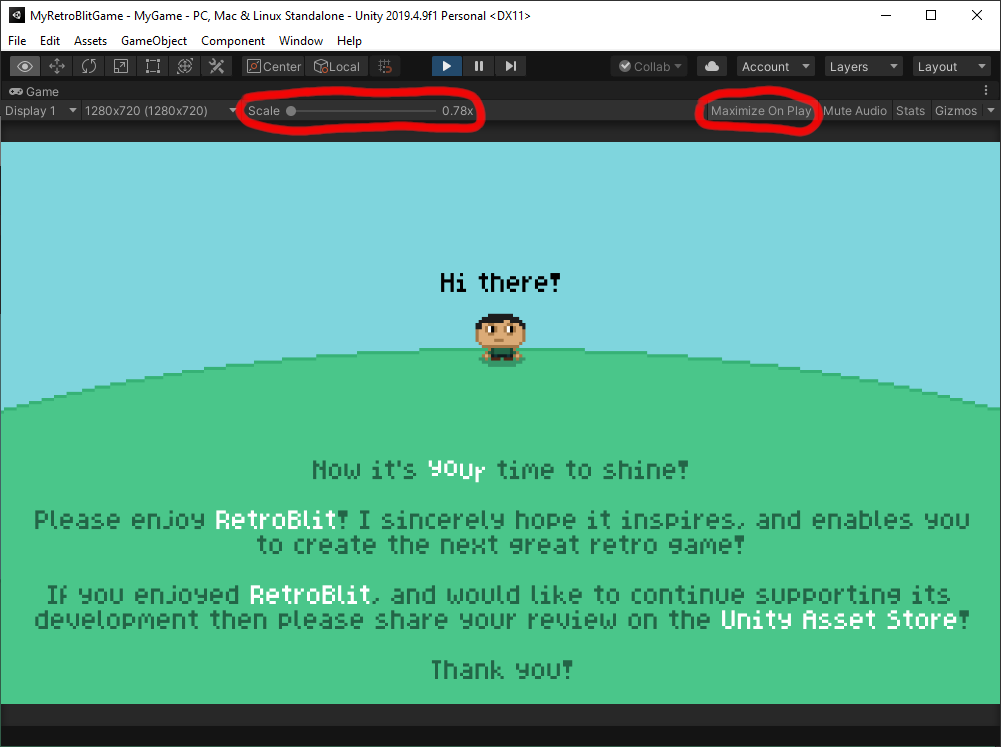
You may want to test your game on different resolutions to see how it would look. You can select an existing resolution from the drop down, or enter your own custom resolution. 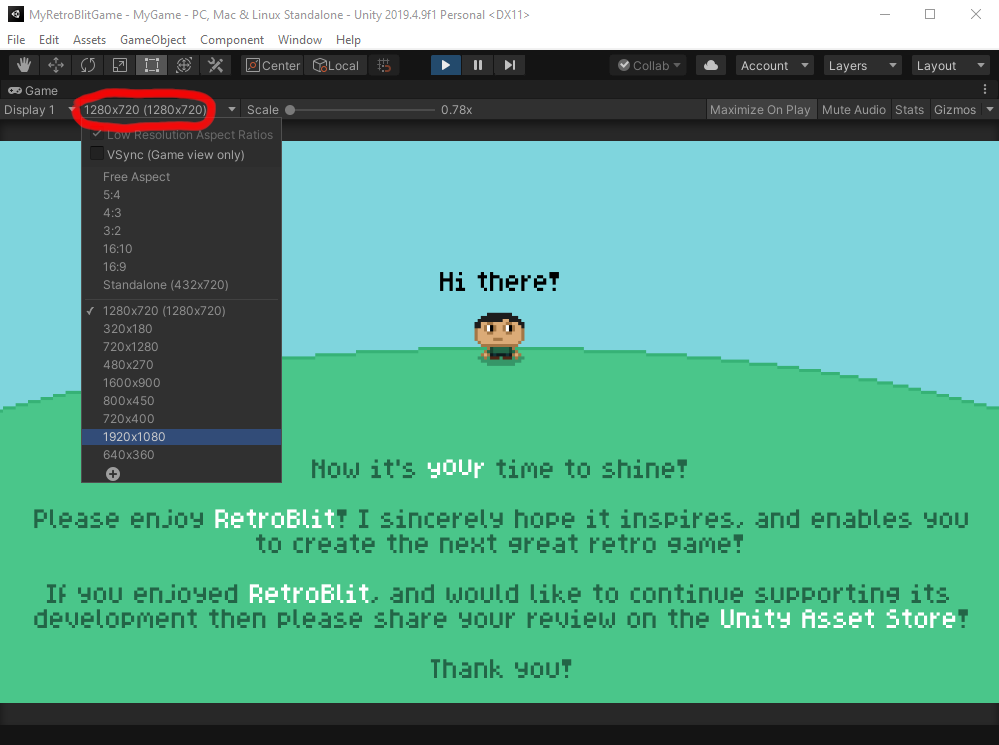
You can enable a Stats overlay that will show you some performance metrics for your game, including frames per second. Keep in mind however that these stats reflect the performance of your game while running within the Unity editor. Once you build your game for release it will run significantly faster. 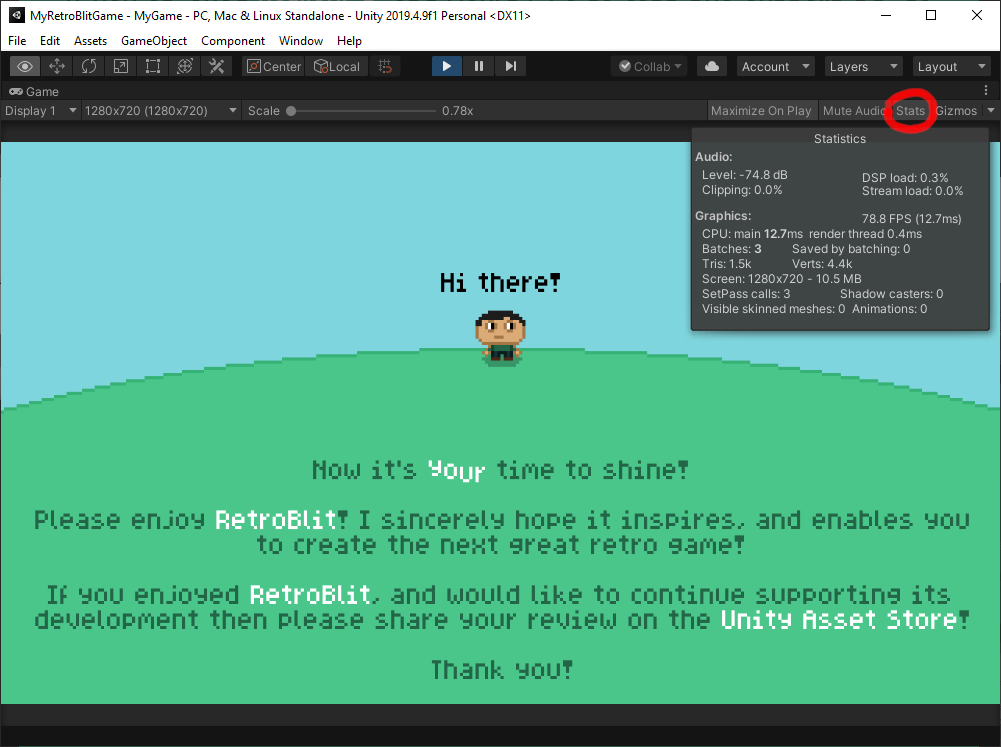
From Window → Profiler you can open the Profiler which can give you quite a bit of insight into where your game may have performance issues. I suggest reading more on the Profiler online to learn how to best get useful information out of it. 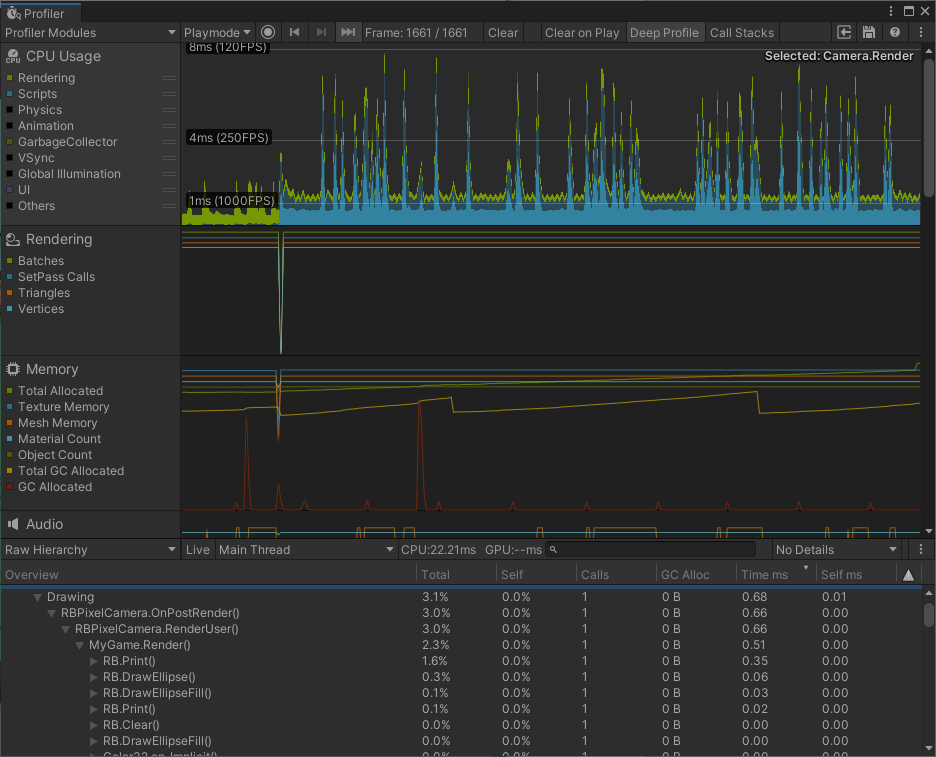
Getting More HelpUnity has another great advantage, it is extremely popular! If you run into any issues with it just search online and you're bound to find an answer quickly! |